Canvas and Nodes
Introduction to the Concept of Canvas
What is a Canvas
- The canvas is the core working area in the system. It is a visual business building environment that allows users to build and orchestrate functional workflows by dragging and connecting different nodes. The canvas provides an intuitive graphical interface, enabling users to design complex business logic visually. Each canvas represents an independent functional module or workflow and can contain various nodes with connections defining their relationships and data flow.
Role of Canvas in the Overall System
- The canvas is essentially the "building block" of the system. By providing a modular and visual development approach, it enables users to efficiently design, implement, and manage complex functions while maintaining system flexibility and scalability.
- The canvas plays the following key roles in the system:
- Functional Modularity: Decomposes complex systems into manageable independent modules, with each canvas focusing on a specific function.
- Visual Orchestration: Provides an intuitive way to design and orchestrate business processes, lowering the technical barrier.
- Resource Sharing and Reuse: Resources created in one canvas can be called by other canvases, promoting collaboration and integration between modules.
- Logic Abstraction: Transforms complex business logic into visual workflows, making it easy to understand and maintain.
- Rapid Iteration: Supports rapid building, testing, and adjustment of functional modules, accelerating the development cycle.
- System Integration: Acts as a bridge connecting different functional components, enabling organic integration of various parts of the system.
Nodes Overview
- Nodes are the basic building blocks in the canvas. They represent different types of resources and can interact and flow data through connections. The node system provides an intuitive visual way for users to design and build complex workflows.
Key Features of Nodes
- Diversity: Includes various types such as resource nodes, tool nodes, LLM nodes, etc., each with specific functions.
- Connectivity: Nodes can establish relationships through connections, forming data flows or logic flows.
- Modularity: Each node is an independent functional unit that can be freely combined to build complex systems.
- Visualization: Visually presents workflows and resource relationships through the canvas, enhancing user experience.
Nodes are essentially encapsulations of functions and data. Through connections between nodes, users can create various logical relationships from simple to complex, achieving seamless collaboration and information transfer between resources, providing visual orchestration capabilities for business processes.
Node Operations
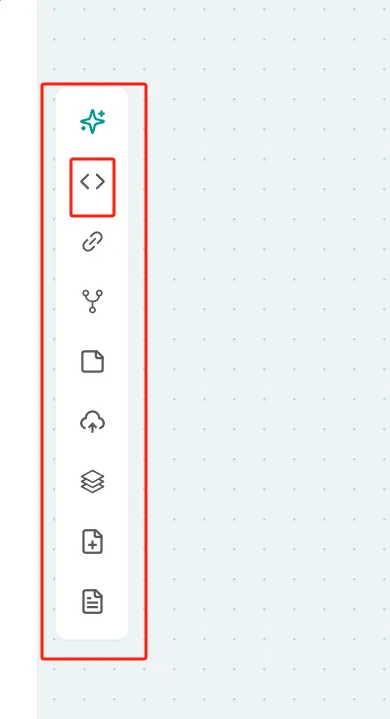
Create New Node -> Each unit in Refly is a node. You can create any functional node you need by clicking with the mouse (refer to later sections of the document for specific node functions). As shown in the figure below, any content created is a node.
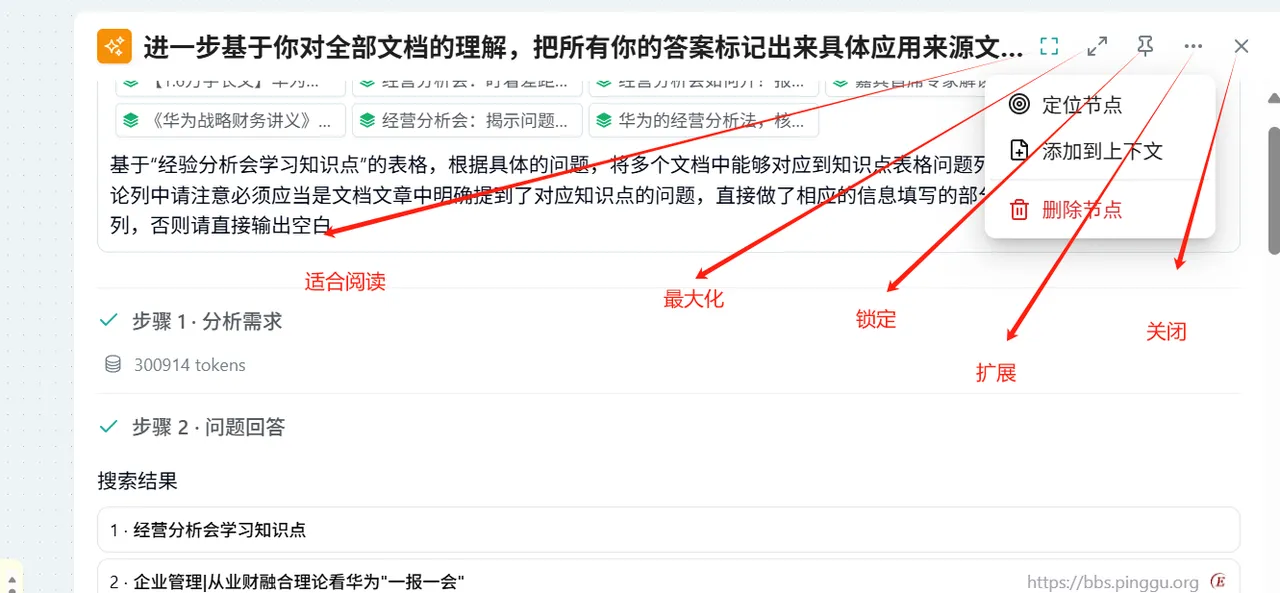
Node Operations -> When you click on a node, the node display opens, appearing on the right side of the canvas. The top right corner shows: Fit to Read, Maximize, Lock, Expand (Locate Node, Add to Context, Delete Node), Close Node Display. Locate Node: Clicking this allows you to locate which node on the canvas provides this display. Add to Context: Delete Node: You can delete the node using this button, which also deletes the corresponding node on the canvas. (Note: Node deletion is an irreversible operation, please proceed with caution).
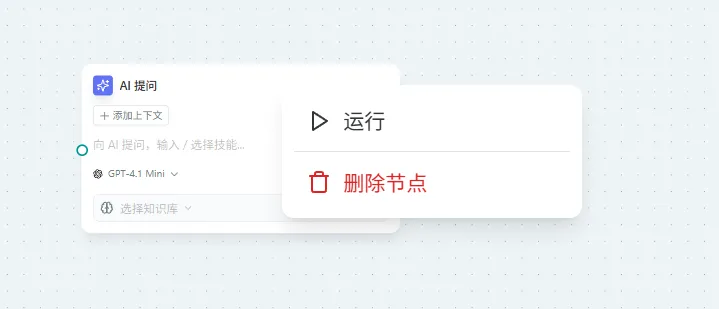
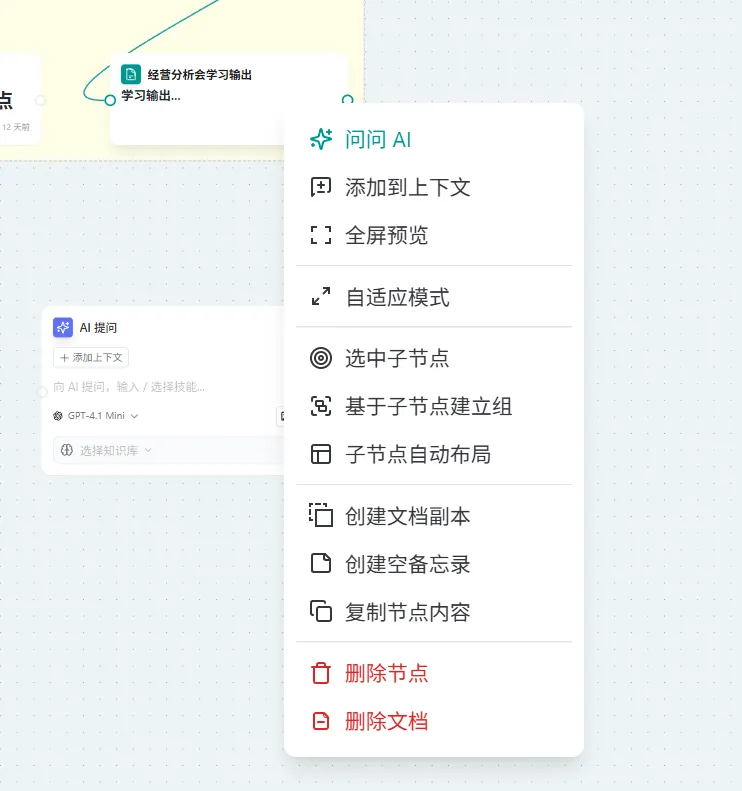
Node Operations (Right-click on a node on the canvas) -> The functions when right-clicking vary depending on the type of node. Please refer to later sections of the document for specific function introductions. However, every node has a delete option when right-clicked, allowing you to delete the node here as well (Note: Node deletion is an irreversible operation, please proceed with caution).
Canvas Area Introduction
Canvas Browsing
Quick Browse:
Quick browse of the canvas will display the last edited canvases, showing information for 4 canvases by default. 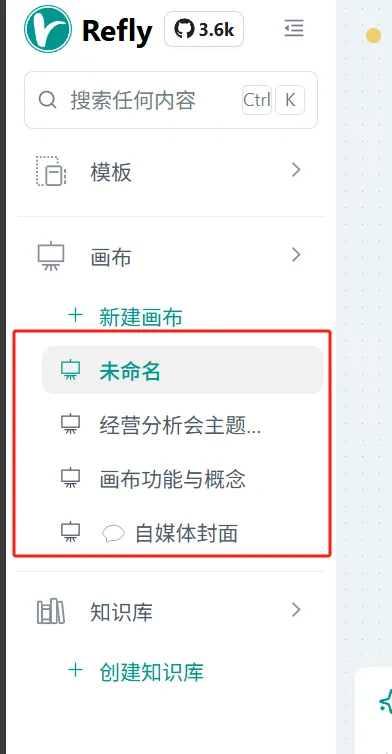
Expand All Canvases:
You can view all historical canvases you have created and managed by clicking the "Expand All Canvases" button. You can browse and select by scrolling. Step 1: Click the canvas as shown in the red box in Figure 1. 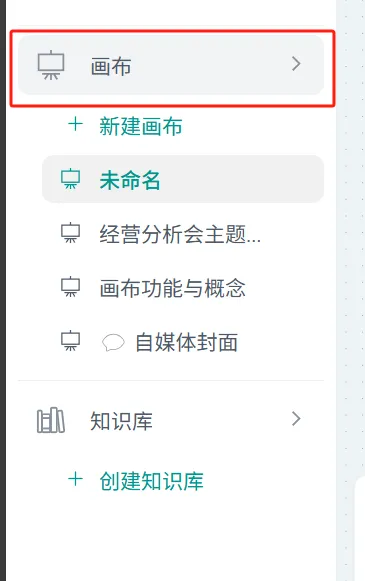 Step 2: You can select the desired historical canvas by scrolling the mouse, as shown in Figure 2. You can continue the conversation for a canvas (enter the canvas, or click the canvas directly), rename, duplicate, or delete the canvas (renaming, duplicating, and deleting canvases will be introduced in later chapters).
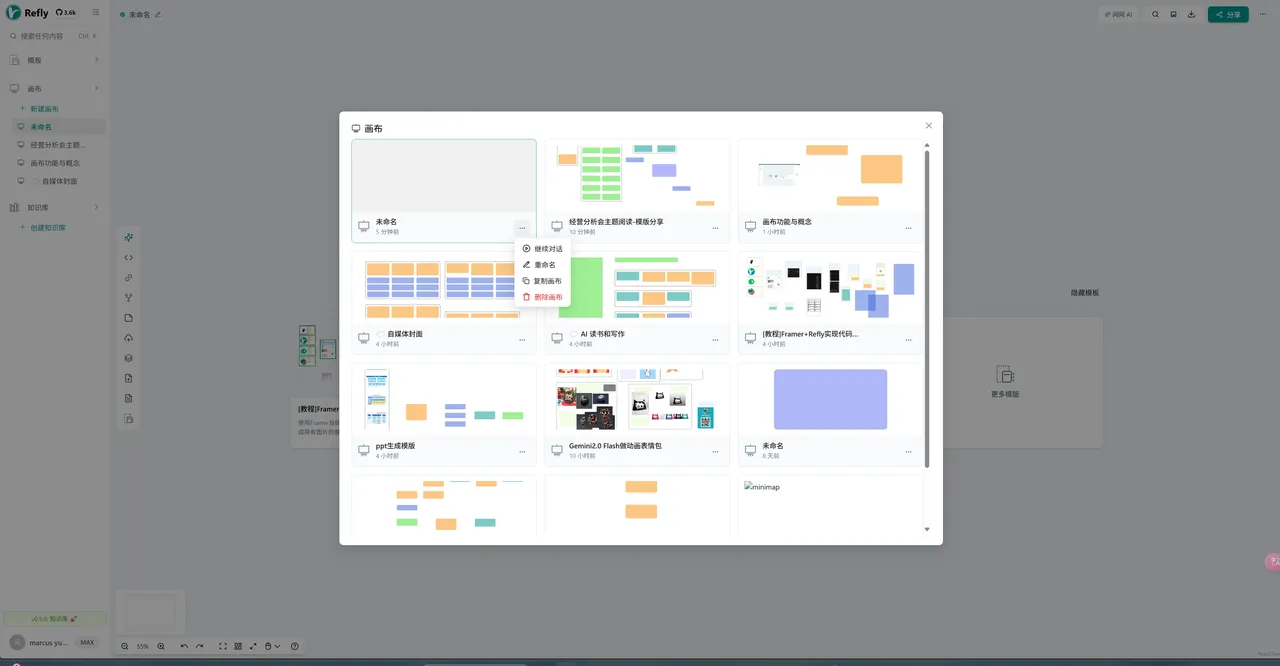
Create New Canvas:
Create a canvas by clicking the "Create New Canvas" button. 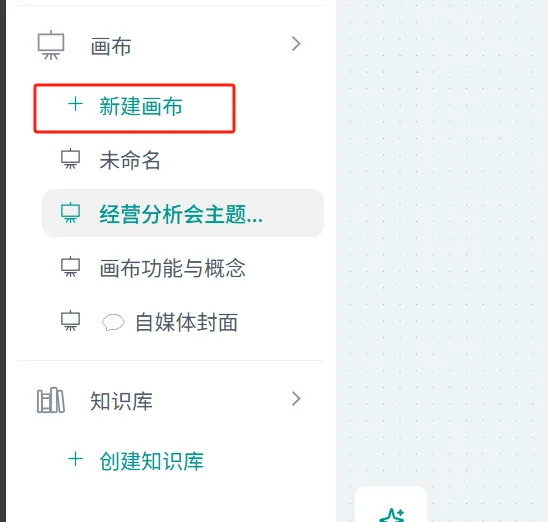
Canvas Operations
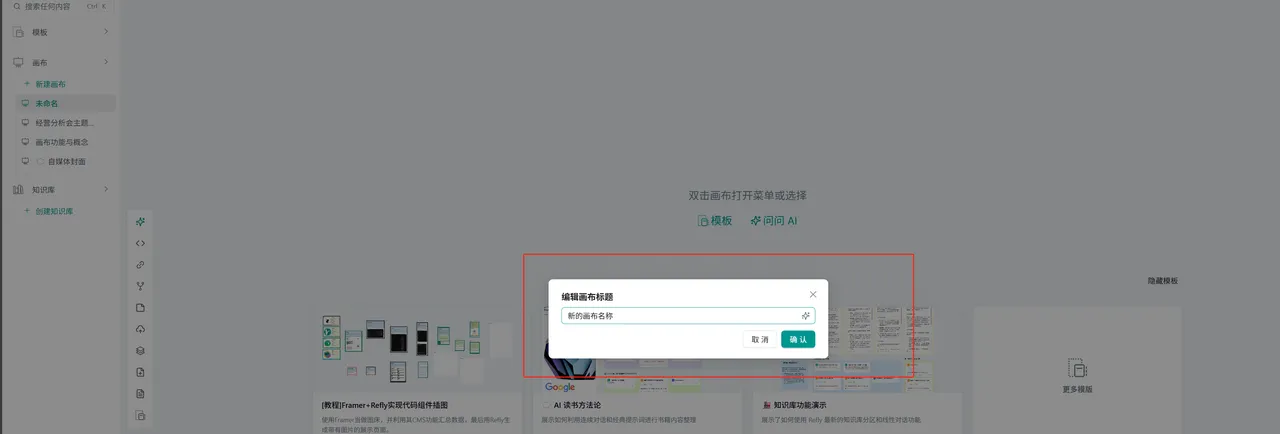
Rename:
Rename the existing canvas (renaming is a logical operation, and the resource names referencing this canvas in other resources will also change accordingly, without affecting your previous business resource references). 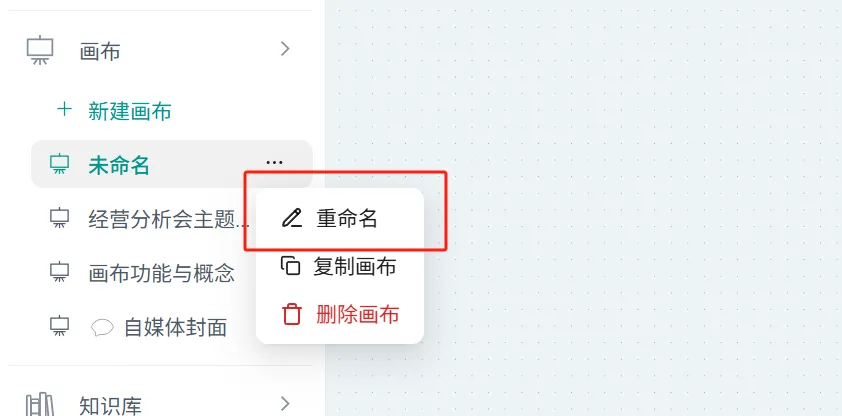
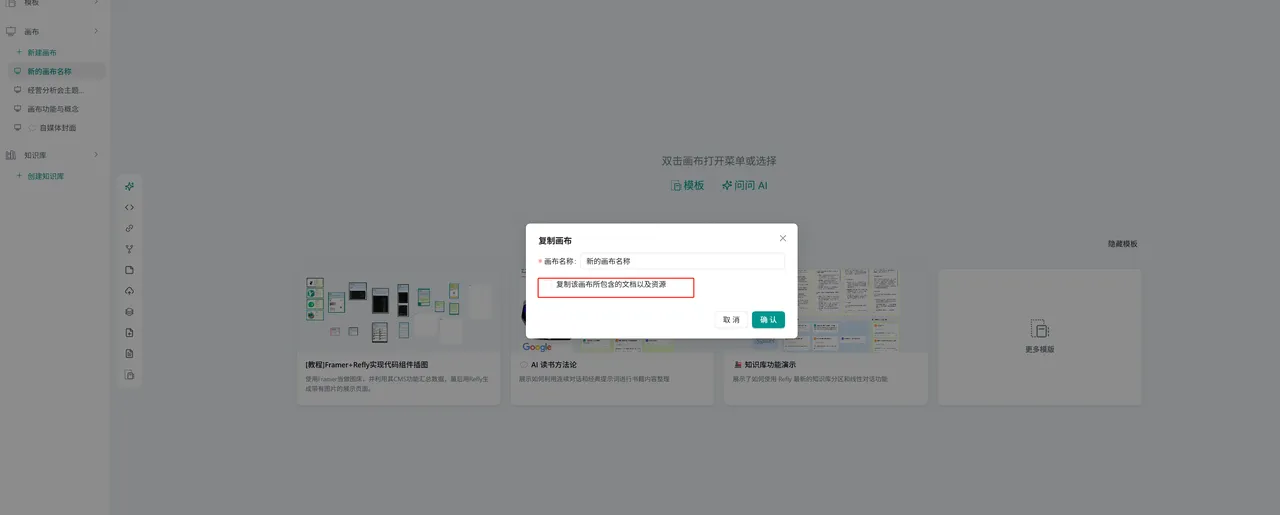
Duplicate Canvas:
Duplicate the existing canvas as a new canvas (Option: Duplicate the documents and resources contained in this canvas). 
Delete Canvas:
The canvas and the workflow nodes within it will be deleted. The resource nodes within the canvas depend on whether you choose to delete them simultaneously (simultaneously delete resources and documents in the canvas). (Note: Canvas deletion is an irreversible operation, please proceed with caution). 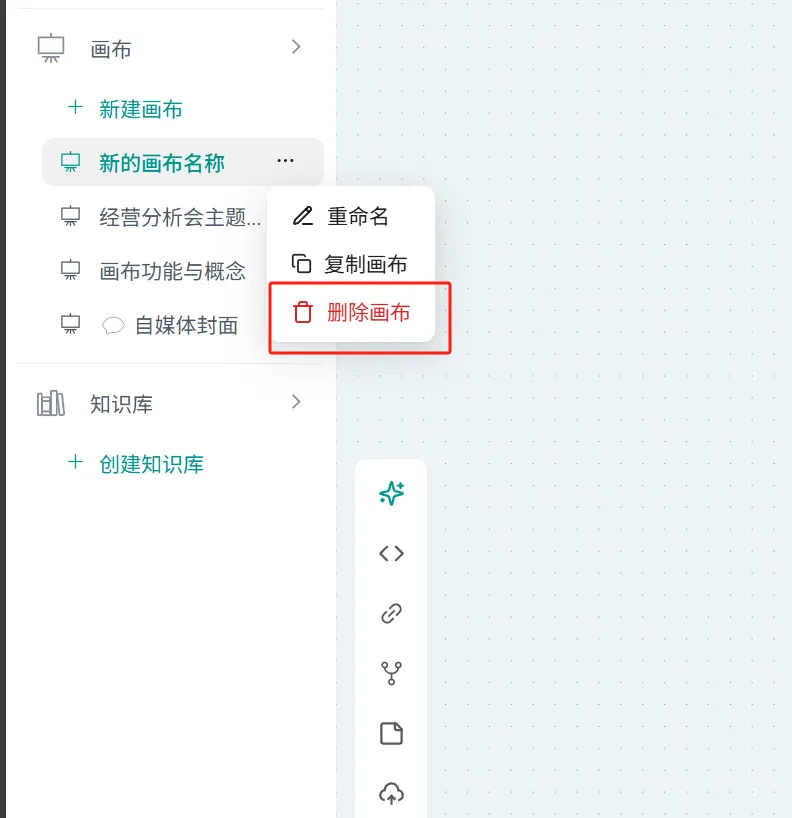 ![图2](/images/2025-04-26-16-15-58.png>