Creation Toolbar
Ask AI
Refer to Ask AI introduction.
Create Code Component
Concept: Code components allow you to embed code content into the canvas and provide the following three view modes for better display and editing of code:
- Preview Mode: Visually displays the running effect of the code, making it convenient for users to quickly understand the code's output.
- Code Mode: Provides an interface focused on code editing, making it convenient for users to write and modify code.
- Split View: Simultaneously displays the code and the preview effect, allowing users to see the impact of code changes on the preview effect in real-time.
Code components support AI interaction features:
- Users can ask AI questions about the code content, such as "What does this code do?".
- Other AI nodes can directly generate code components, such as generating a piece of JavaScript code based on user requirements.
Through code components, you can seamlessly integrate programming capabilities into the creation process, thereby improving work efficiency.
Operation:
Create a new code component node: In the toolbar, click the
<>button to create a new code component node on the canvas.Select code type: In the dropdown box of the code component node, select the code type you want to use, such as HTML, JavaScript, or CSS.
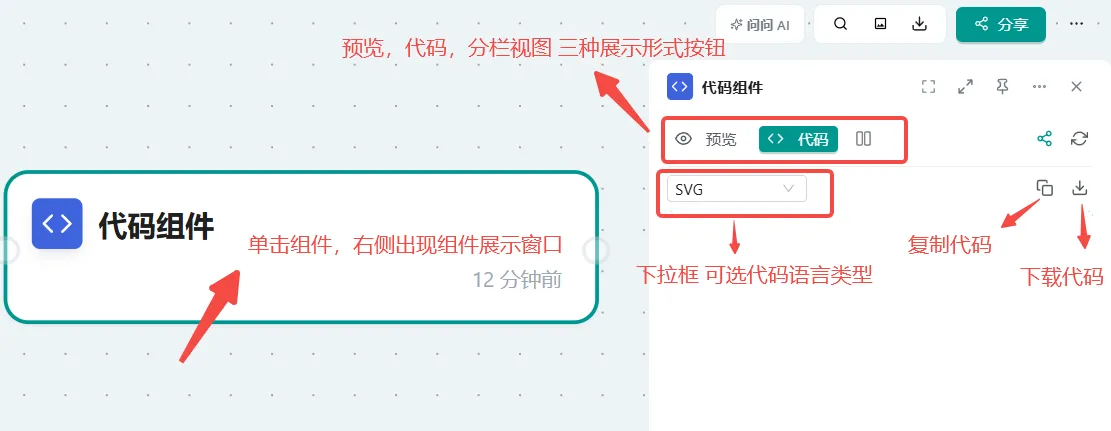 Figure: Select code type dropdown box
Edit code: In the code editing area, you can enter or paste your code.
Preview code: The code component provides preview, code, and split views for you to easily check the code effect.
Preview View: Displays the running result of the code.
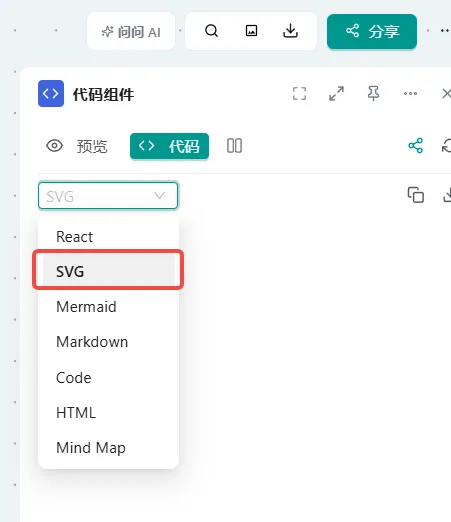 Figure: Preview effect of SVG component
Code View: Focuses on code editing.
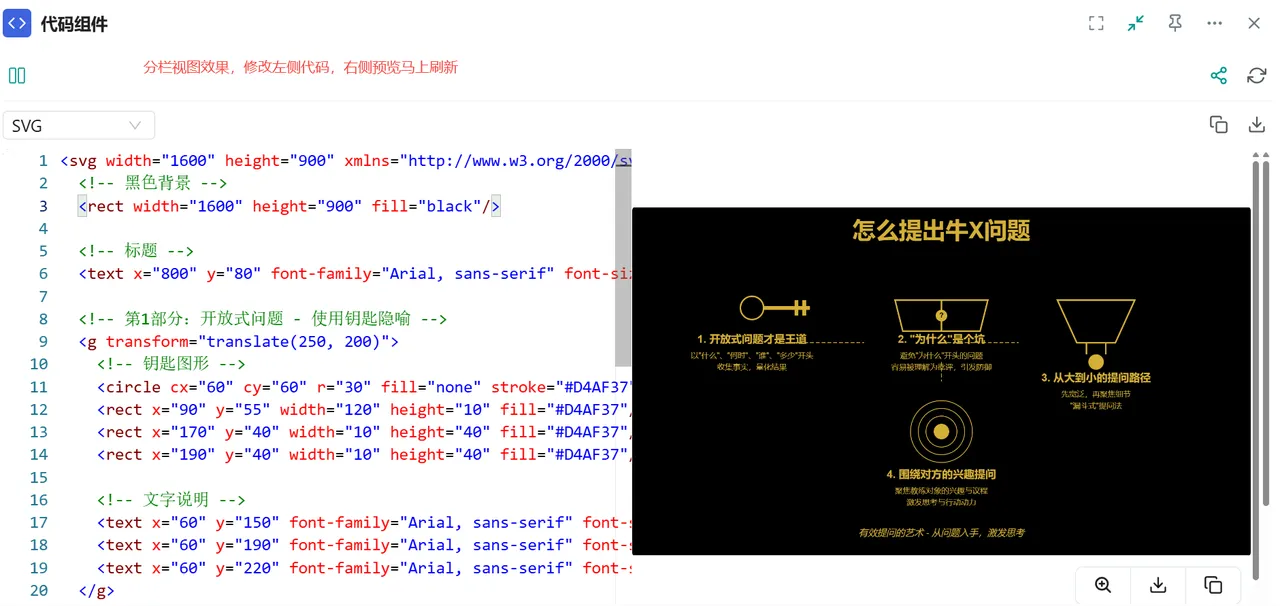
Split View: Simultaneously displays the code and the preview effect, making it convenient for you to see the impact of code changes on the preview effect in real-time.
 Figure: Modify code and preview in real-time using split view
Adjust preview effect: In the preview view, you can use the buttons in the lower right corner to zoom in, download, or copy the image.

Modify code and preview in real-time: If the preview effect is not ideal, you can use the split view to modify the code while viewing the preview effect in real-time. For complex code modifications, it is recommended to use professional IDE tools.
Exit code component: After finishing modifications, you can press the
Esckey or click the close button in the upper right corner to return to the canvas interface.
Create Website Node
Concept: The website node function allows you to import webpage content into the canvas and transform it into an interactive node. You can directly ask AI questions based on the content of these nodes, thereby achieving intelligent utilization and analysis of web resources.
Operation:
Create a new website node: In the toolbar, click the small chain button to create a website node.
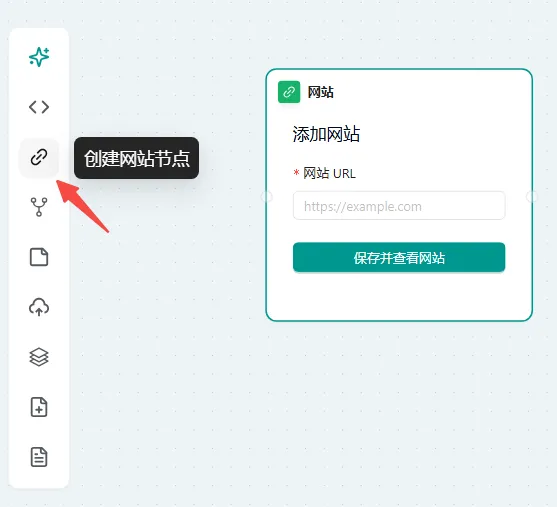 Figure: Create new website node button
Paste URL and view: Copy the URL of the webpage you want to collect, paste it into the input box, and then click "Save and View Website". The webpage content will be displayed on the right side.
 Figure: Paste URL and view webpage content
Website node operation buttons: There are three operation buttons below the website node:
- Red button: Copy the URL of the current webpage.
- Green button: Open the link in a new browser window.
- Blue button: Edit the URL of the current node.
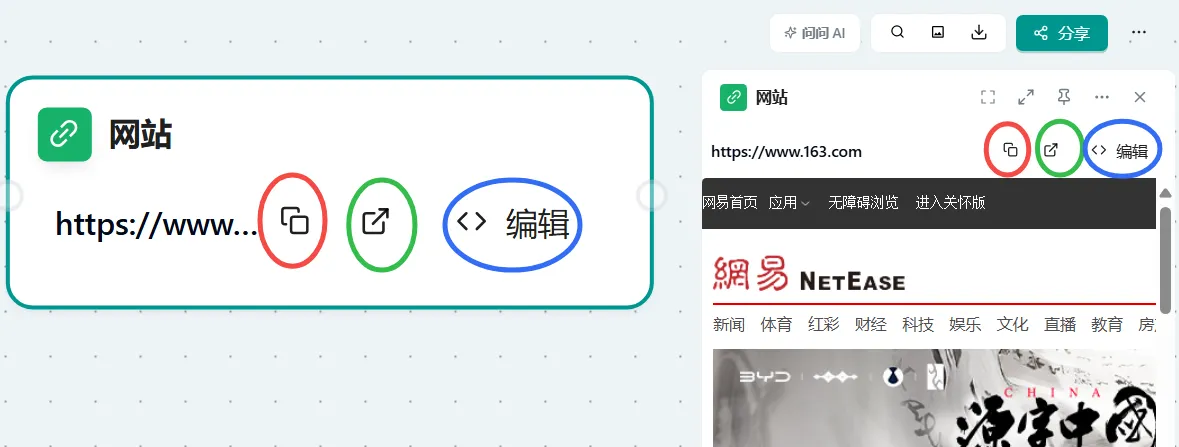 Figure: Three operation buttons of the website node
Ask questions by referencing webpage content: You can use the webpage content as context to ask AI questions.
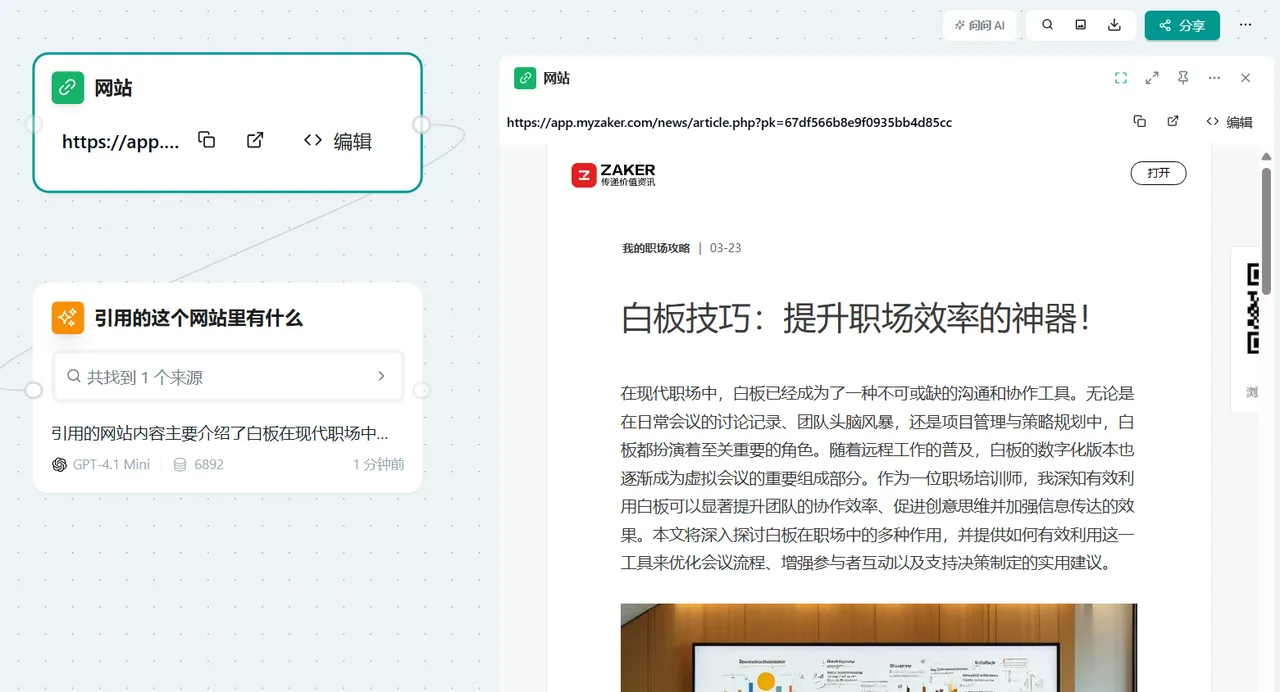 Figure: Ask questions by referencing webpage content as context

Create Mind Map Node
Concept: The create mind map node function allows you to insert interactive mind maps into the canvas to visualize and organize your thoughts. Mind map nodes can be created manually or generated directly by AI. Essentially, it is a Mind Map widget.
Operation:
Create a new mind map node: In the toolbar, click the button with the connection split style to create a mind map node.
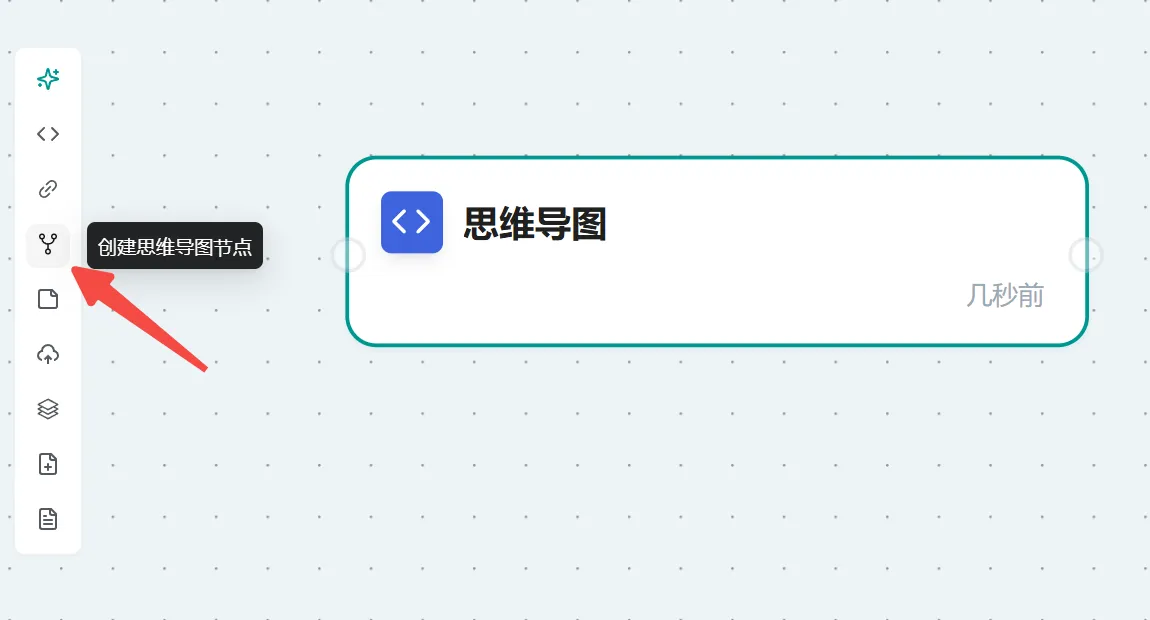 Figure: Create new mind map node button
View node preview: Click the mind map node, and the preview effect will be displayed on the right side. You can see that this is a Mind Map code widget, which contains your mind map content.
 Figure: Click the node, and the preview effect appears on the right
Adjust mind map size: You can adjust the size of the mind map by clicking the size control button in the lower right corner.
 Figure: Adjust the size of the mind map by clicking the size control button in the lower right corner
Maximize preview view: For a better user experience, it is recommended to first click the preview button in the preview view, and then click the maximize button to enter the ideal interface for using the mind map.
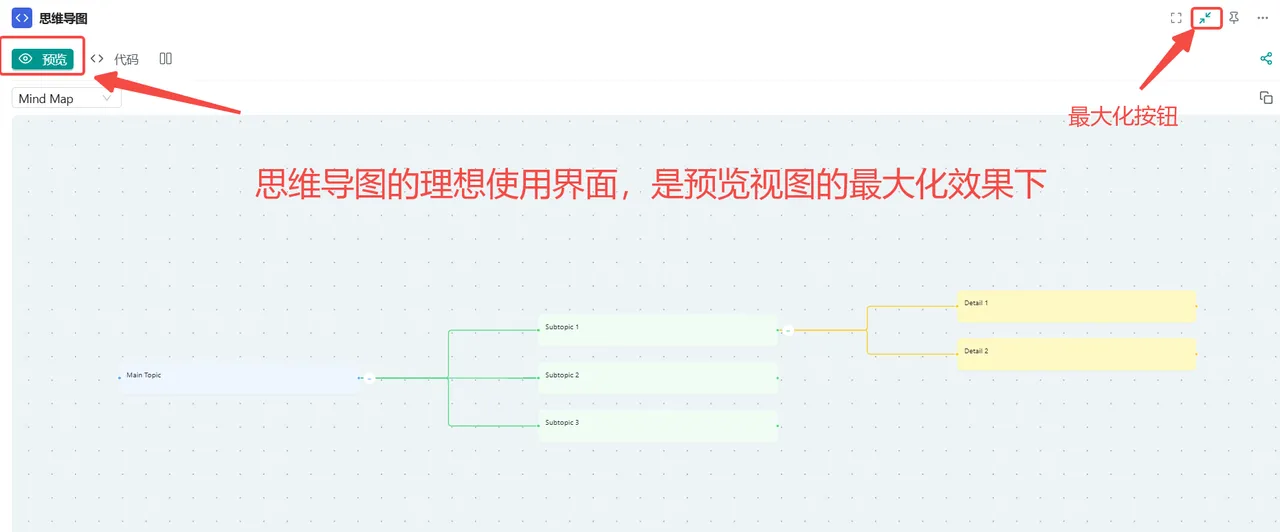 Figure: Ideal interface for using the mind map
Edit branch nodes: Hover the mouse over a branch node, and floating buttons will appear, allowing you to perform the following operations:
- Edit branch: Edit the branch content in card format.
- Add child card: Create a next-level branch.
- Add sibling card: Add a new card at the same level as the current card.
 Figure: Edit branch, add child card, create next-level branch
Copy card content: Click the copy button to copy the content within the card to the clipboard, making it convenient to paste elsewhere.
 Figure: Click copy to copy the content inside the card to the clipboard
Modify card content and format: Click inside the card to modify the card's content. A floating toolbar will also appear, allowing you to change the card's background color and adjust the font size, color, and other formats of the content.
 Figure: Click inside the card to modify the content inside the card
Delete card: Select the card you want to delete and click the delete card button. This will delete the current card and all its next-level branches.
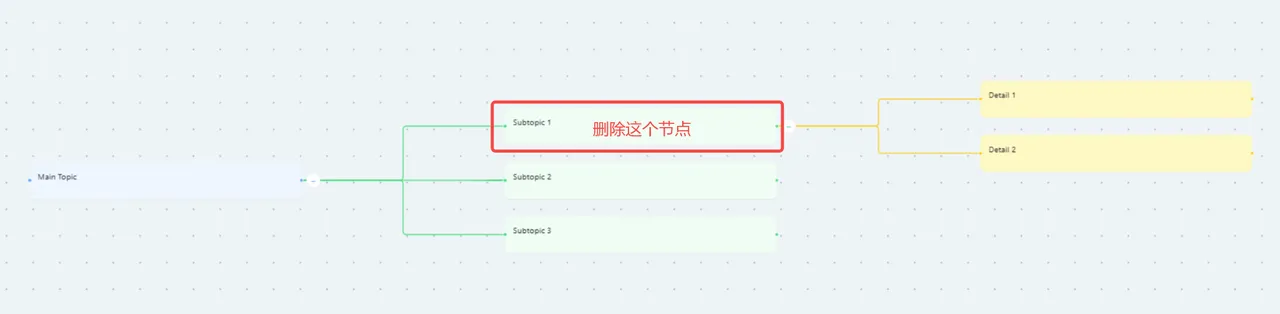 Figure: Select the card to delete, click delete card
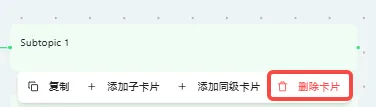 Figure: Delete card
 Figure: Delete card
Create Memo
Concept: The memo function allows you to add sticky note-like annotations on the canvas to record important information or serve as content separators. This is particularly useful for organizing and illustrating content in complex canvases.
Operation:
Create a memo node: Click the create memo button, and a default light yellow memo node will be generated on the canvas.
 Figure: Click the create memo button, a default light yellow node is generated
Edit memo content: Click inside the memo node to edit the content. At the same time, an editing tool floating window will appear above, allowing you to change the memo's color and adjust the font size, color, and other formats of the content. The lower right corner of the memo will display the time since creation.
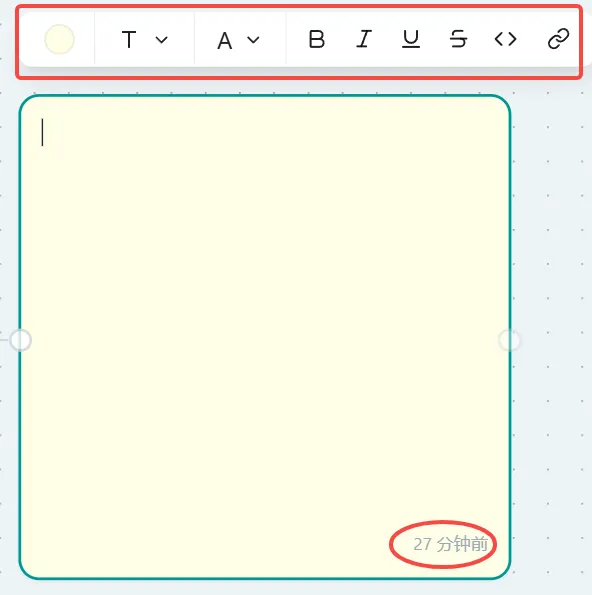 Figure: Edit inside the memo node to edit content
Adjust memo size: You can adjust the size of the memo node by dragging the circular points at the four corners of the memo.
 Figure: Adjust the size of the memo node by dragging the four corner points
Memo usage scenarios: The following images show the usage scenarios of memos.
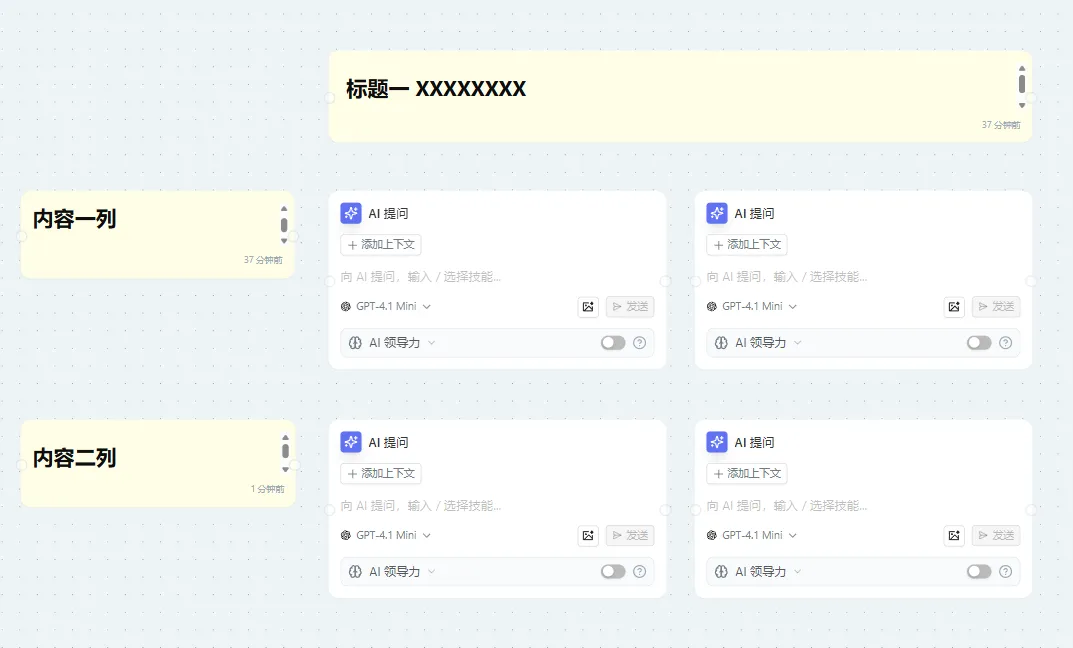 Figure: Memo usage scenario display
Import Resources
Web Search
- Concept: The web search function allows you to directly import internet search results into the canvas for easy content integration and analysis.
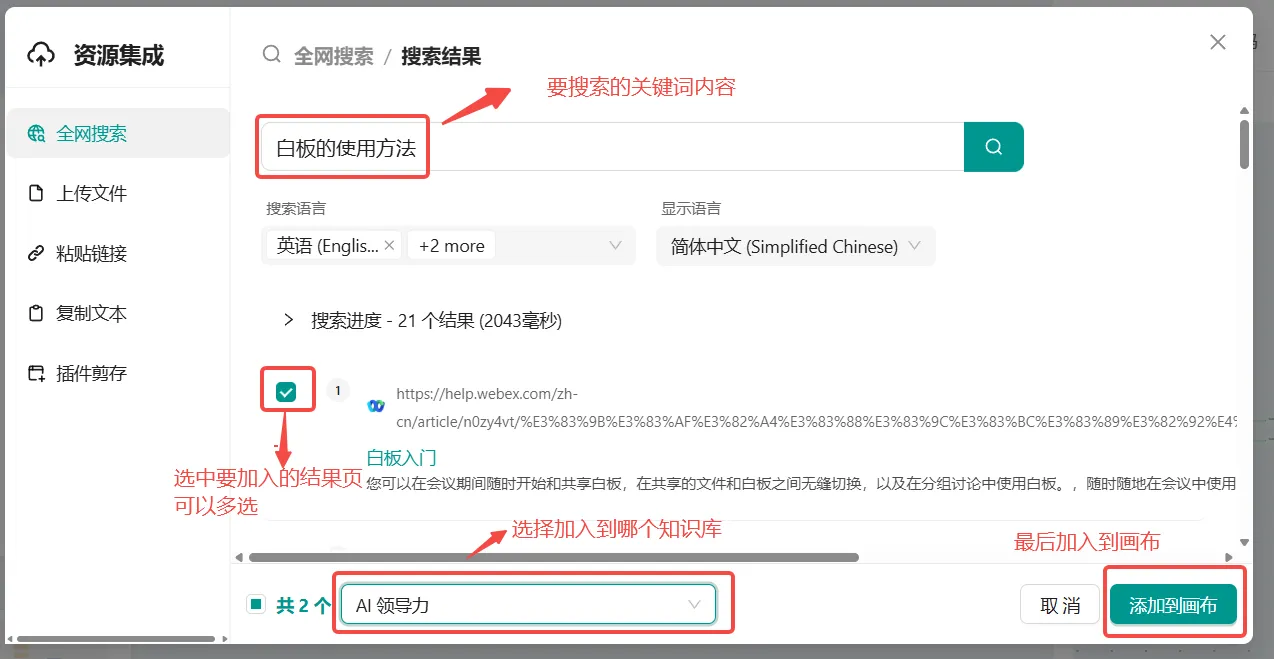 Figure: Web Search
Upload File
- Concept: The file upload function allows you to import local files into the canvas for convenient content management and processing.
- Operation: You can upload files by clicking or dragging and dropping.
The following file types are supported:
- DOCX
- RTF
- TXT
- MD
- HTML
- EPUB
Each file supports a maximum of 30MB. File parsing consumes usage quota, and different plans have different quota amounts, calculated daily.
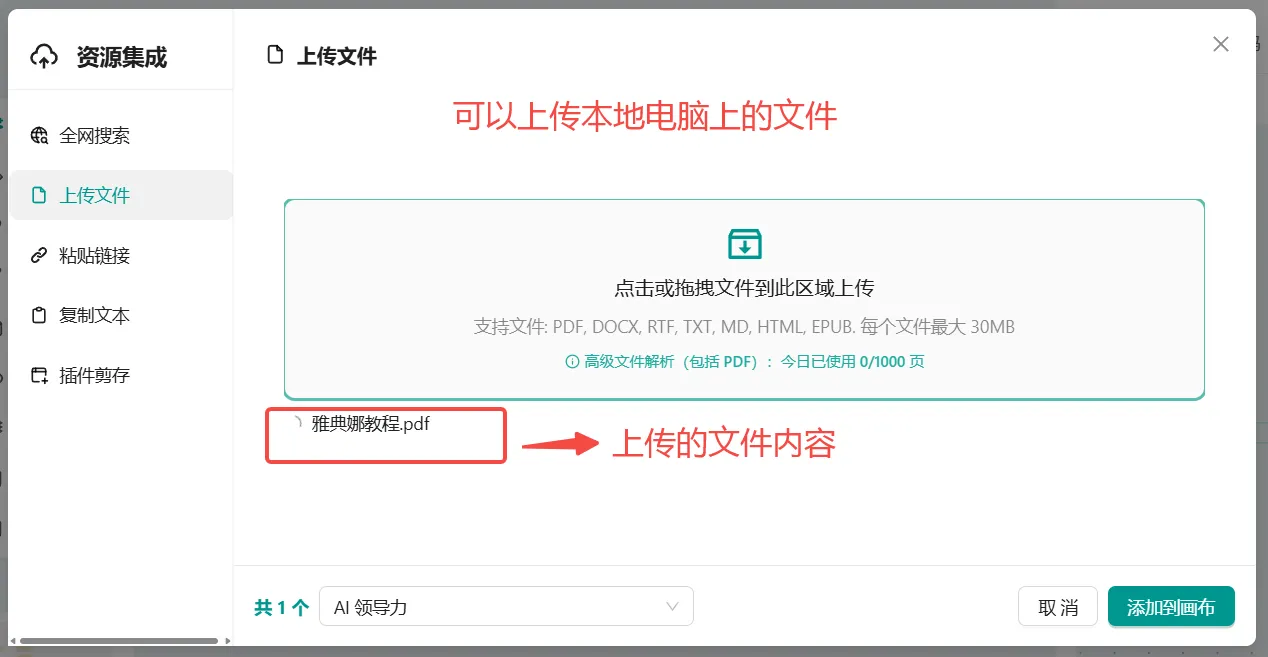 Figure: Upload File
Paste Link
- Operation: You can paste the selected link into the input box to add it to the canvas.
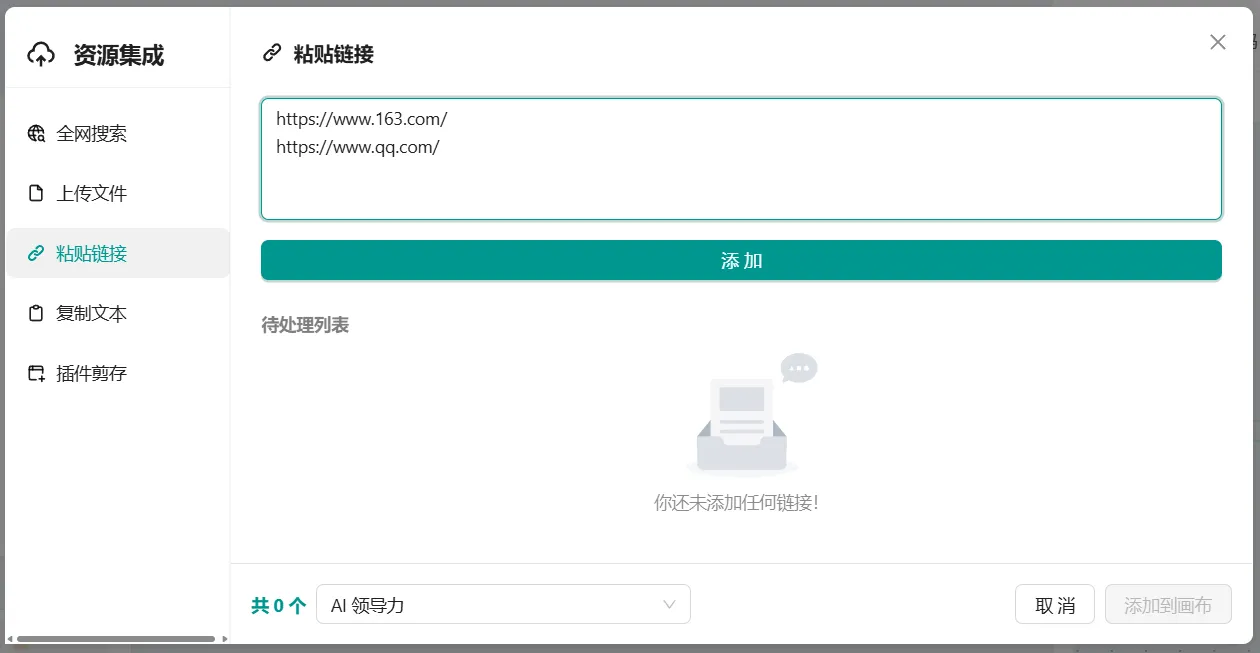 Figure: Paste Link
After successful addition, the link will enter the pending list.
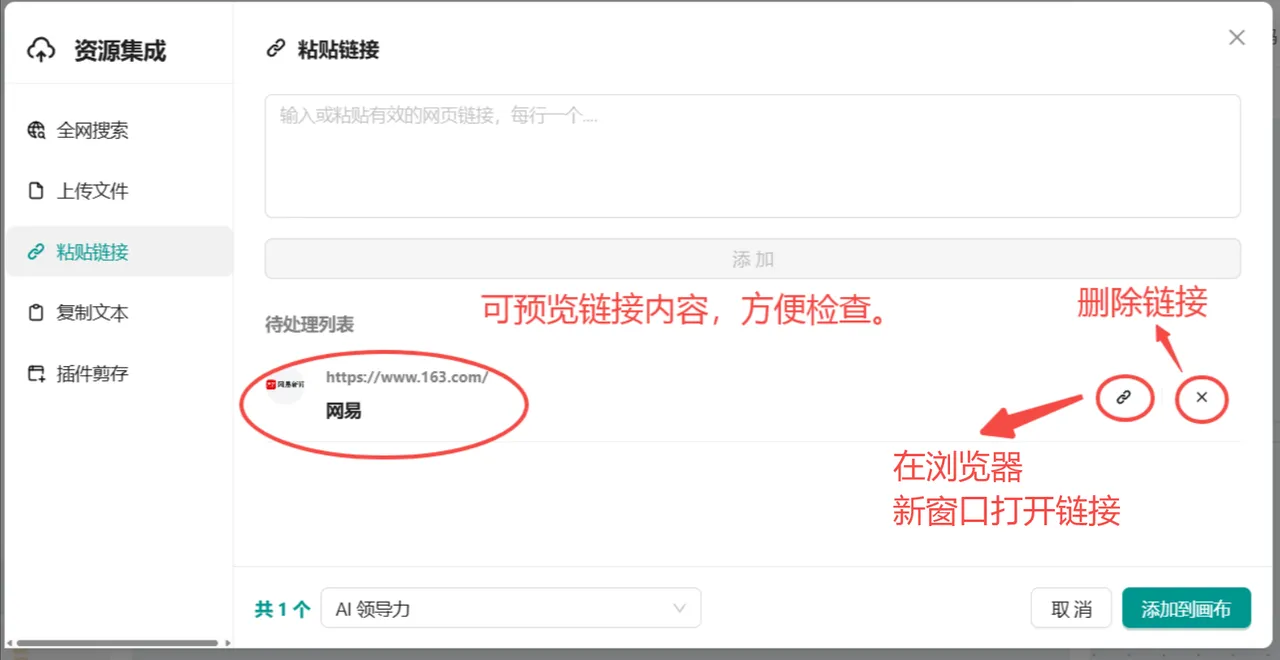 Figure: Added to pending list
Copy Text
- Concept: The copy text function allows you to enter or paste text content. The title and link are optional, but the text content is required. This function can improve efficiency, reduce errors, save time, and facilitate quick migration of content from other sources.
- Operation: After copying content from other sources, you can paste it directly. The title and link can be left blank. The text content field is required and is indicated by a red asterisk.
 Figure: Copy Text
After adding to the canvas, a resource node will be generated.
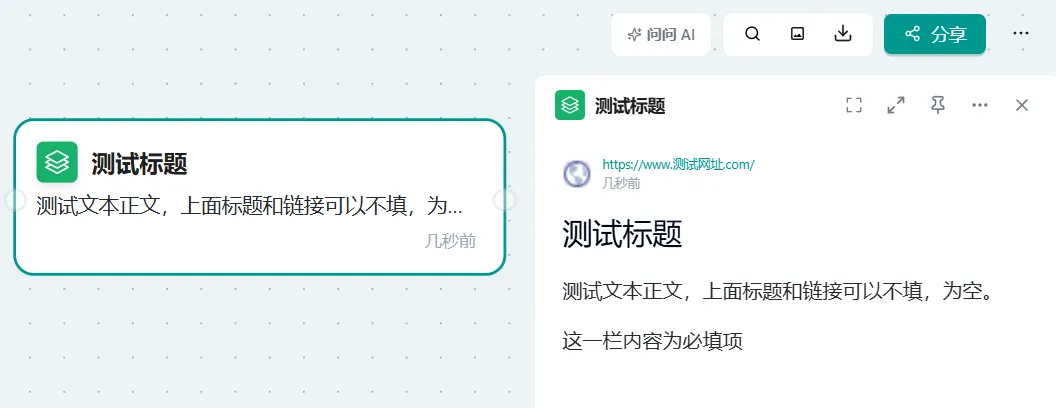 Figure: Resource node
Plugin Clipping
- Concept: The browser plugin function allows you to directly add webpage content to the canvas with one click through a browser plugin, achieving efficient content collection and organization.
- Operation: You can watch the video introduction on the page or click the link below to view the detailed documentation:
 Figure: Plugin Clipping
Add Resource
Concept: In Refly, whether it's content obtained from the internet, uploaded files, or content generated by Refly, it exists in the form of resource nodes. Through the "Add Resource" function, you can add these resources to the current canvas for secondary use.
Operation:
- In the "Creation Toolbar", click the "Add Resource" button.
- Select the resource you want to add to the canvas.
- After clicking "Confirm", the selected resource will be added to the currently open canvas.
Figure 1: Add Resource 
Figure 2: Add Resource 
Create New Document
Concept: The "Create New Document" function allows you to create a blank document, suitable for when you need to write content yourself or copy content from elsewhere into the document. The created document will exist as a resource node and can be used in other components of Refly.
Operation:
- In the "Creation Toolbar", click the "Create New Document" button.
- Wait a moment, and the new document will be added to the current canvas.
Figure 1: Create New Document 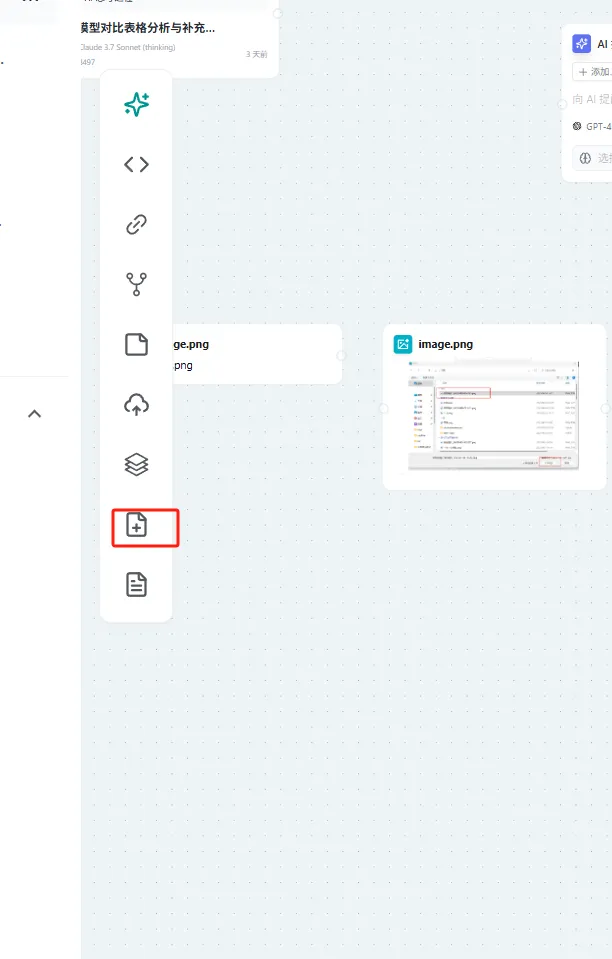
Figure 2: Create New Document 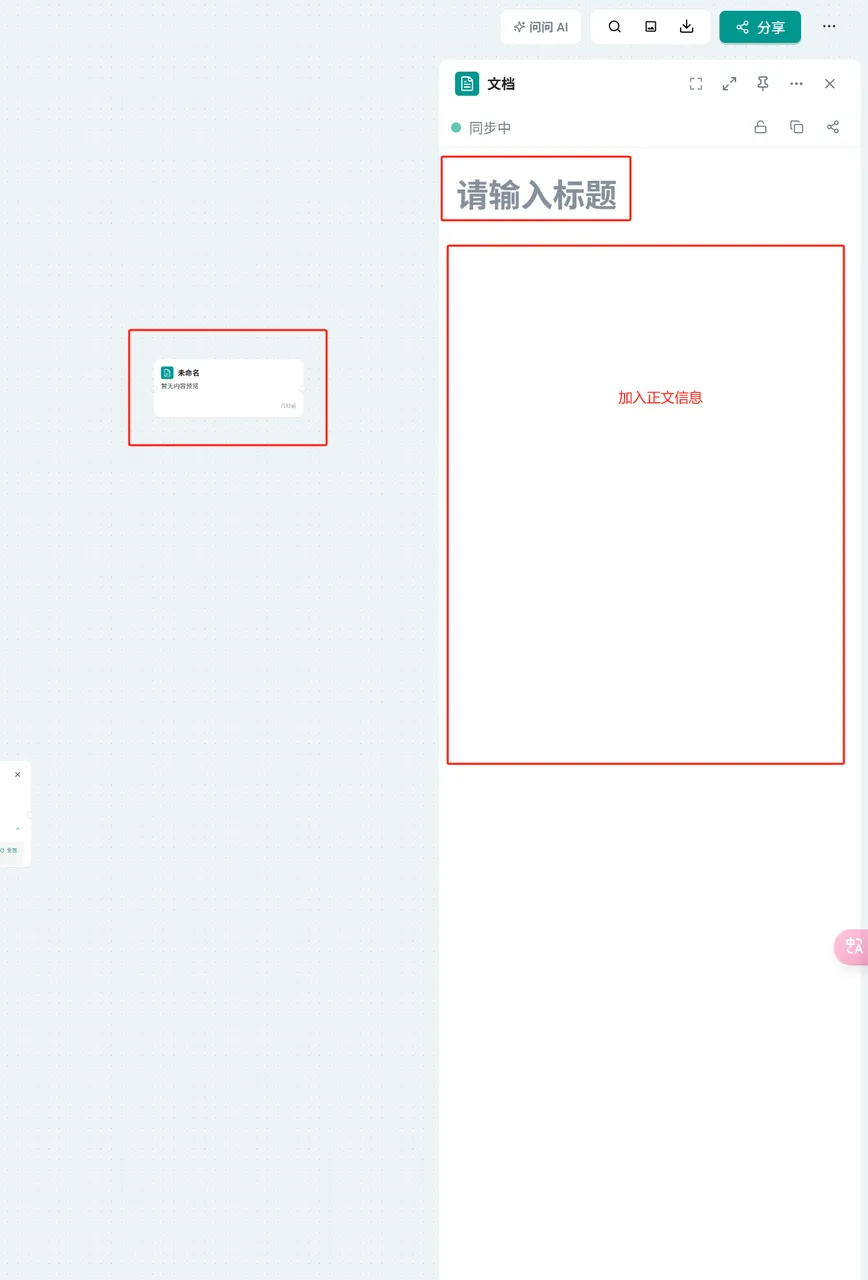
Add Document
- Concept: The "Add Document" function allows you to import documents that have already been created in any canvas, thereby achieving cross-canvas reuse of documents. (For how to create a new document, please refer to the description of the "Create New Document" function above.)
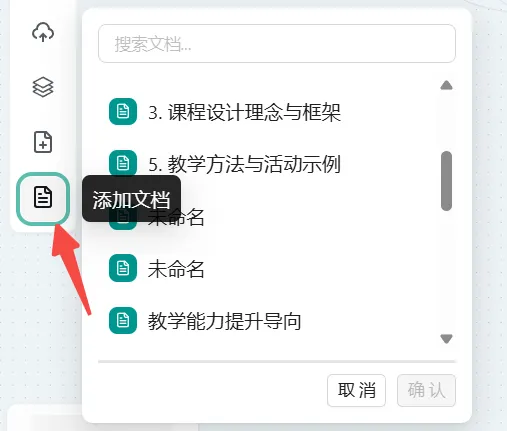 Figure: Add Document
Operation:
- In the "Creation Toolbar", click the "Add Document" button.
- Search for the document title, or scroll to find the document you need to add.
- After selecting the document, click the "Confirm" button in the lower right corner.
- The document is successfully added.
 Figure: Add Document